Blimp
From an eBay hunt a few years back, I still had an empty Macintosh SE case from 1987 lying around. I thought it would be a fun project to bring it back to life and use it to display useful information.
Idea
Because I wanted to preserve the retro look of the case, my goal was to build a UI that would look like it was from the 80s. I therefore wanted a minimalistic UI without any fancy animations or effects.
I could have made a web app for this and just made it look like the 80s, but I wanted to try something different. Building a UI in the terminal felt like a fun challenge as I didn’t have any experience with it at that point.
Turns out there are amazing libraries for building terminal UIs for various programming languages that even allow you to render images and build interactive components. Perfect for this project, and the constraints of the terminal would still give it a retro look out of the box.
Software
Because I liked the idea of having a single, zero-dependency binary that could run on any machine, I wanted to build the software in Go. After some research I found Tcell which is a library for building pretty terminal UIs in Go.
To render graphs I found another library asciigraph that turns arrays of numbers into ASCII art graphs, perfect for rendering in a terminal.
Before implementing anything I had to decide what I actually wanted to display in the terminal. For this I came up with an initial list of widgets that I thought would be useful to have:
- Current weather and forecast
- Network latency to a specific host
- Application status checks
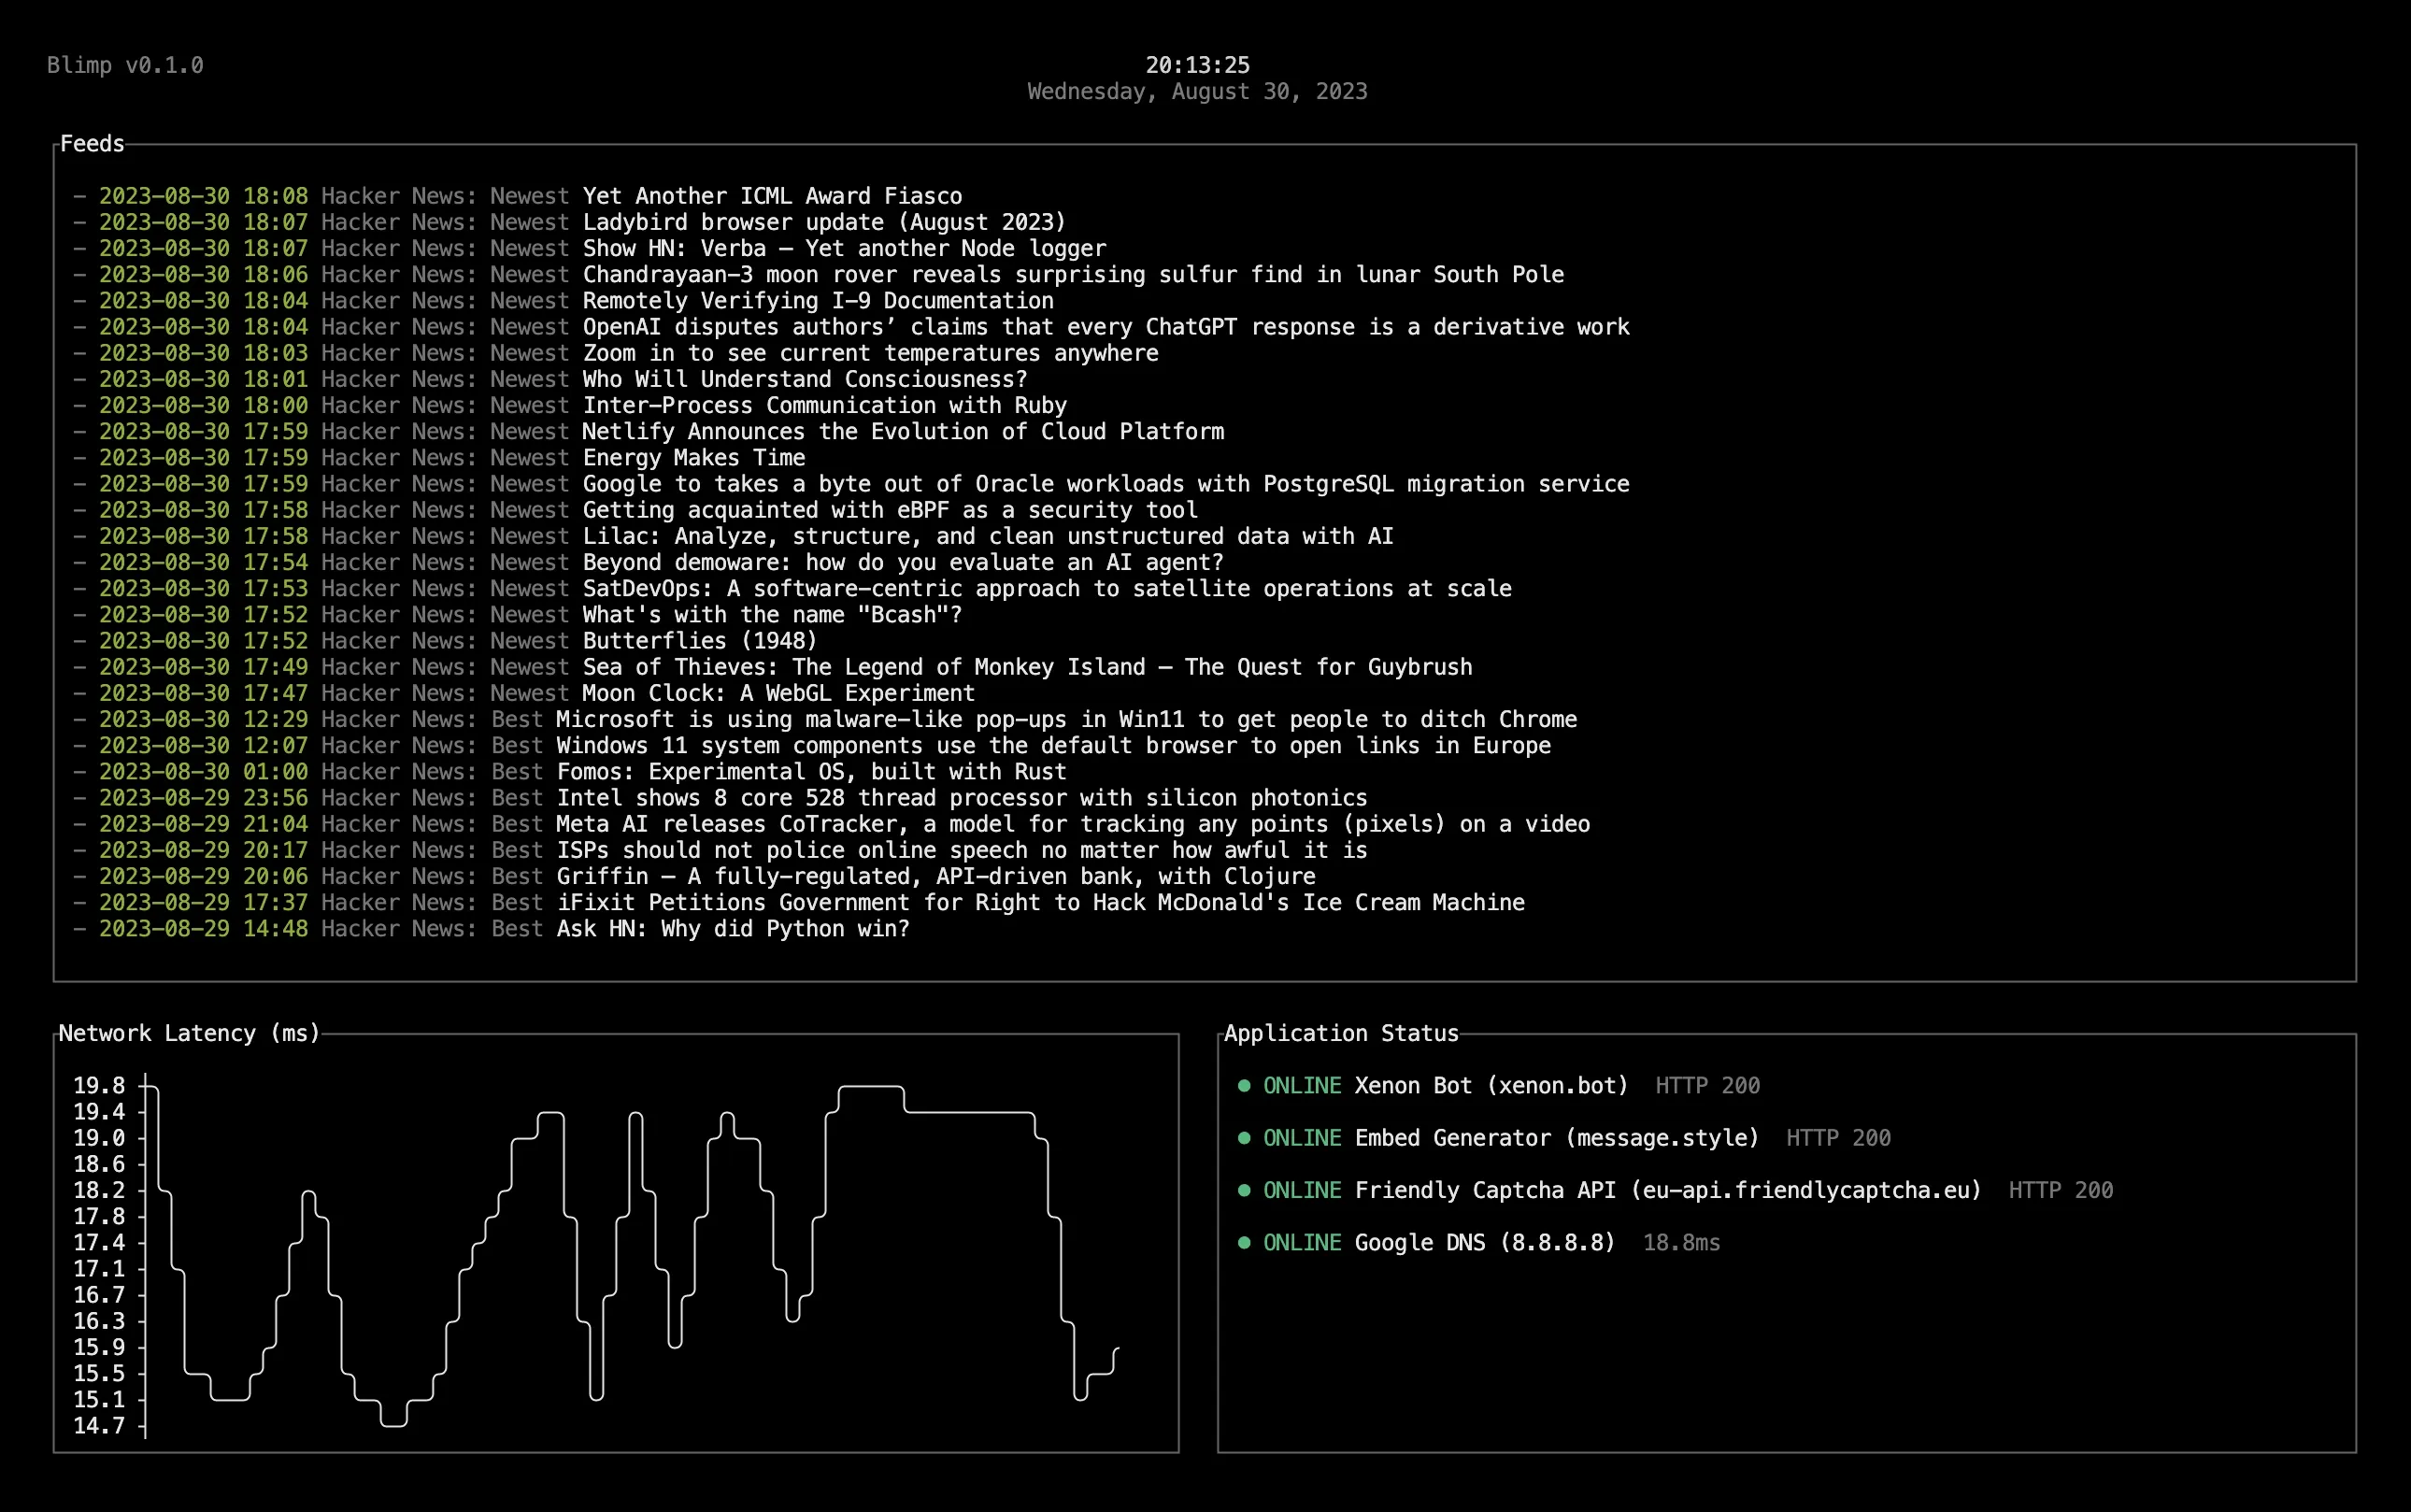
Later I also had the idea to display random quotes and integrate RSS feeds to display the latest news and blog posts.
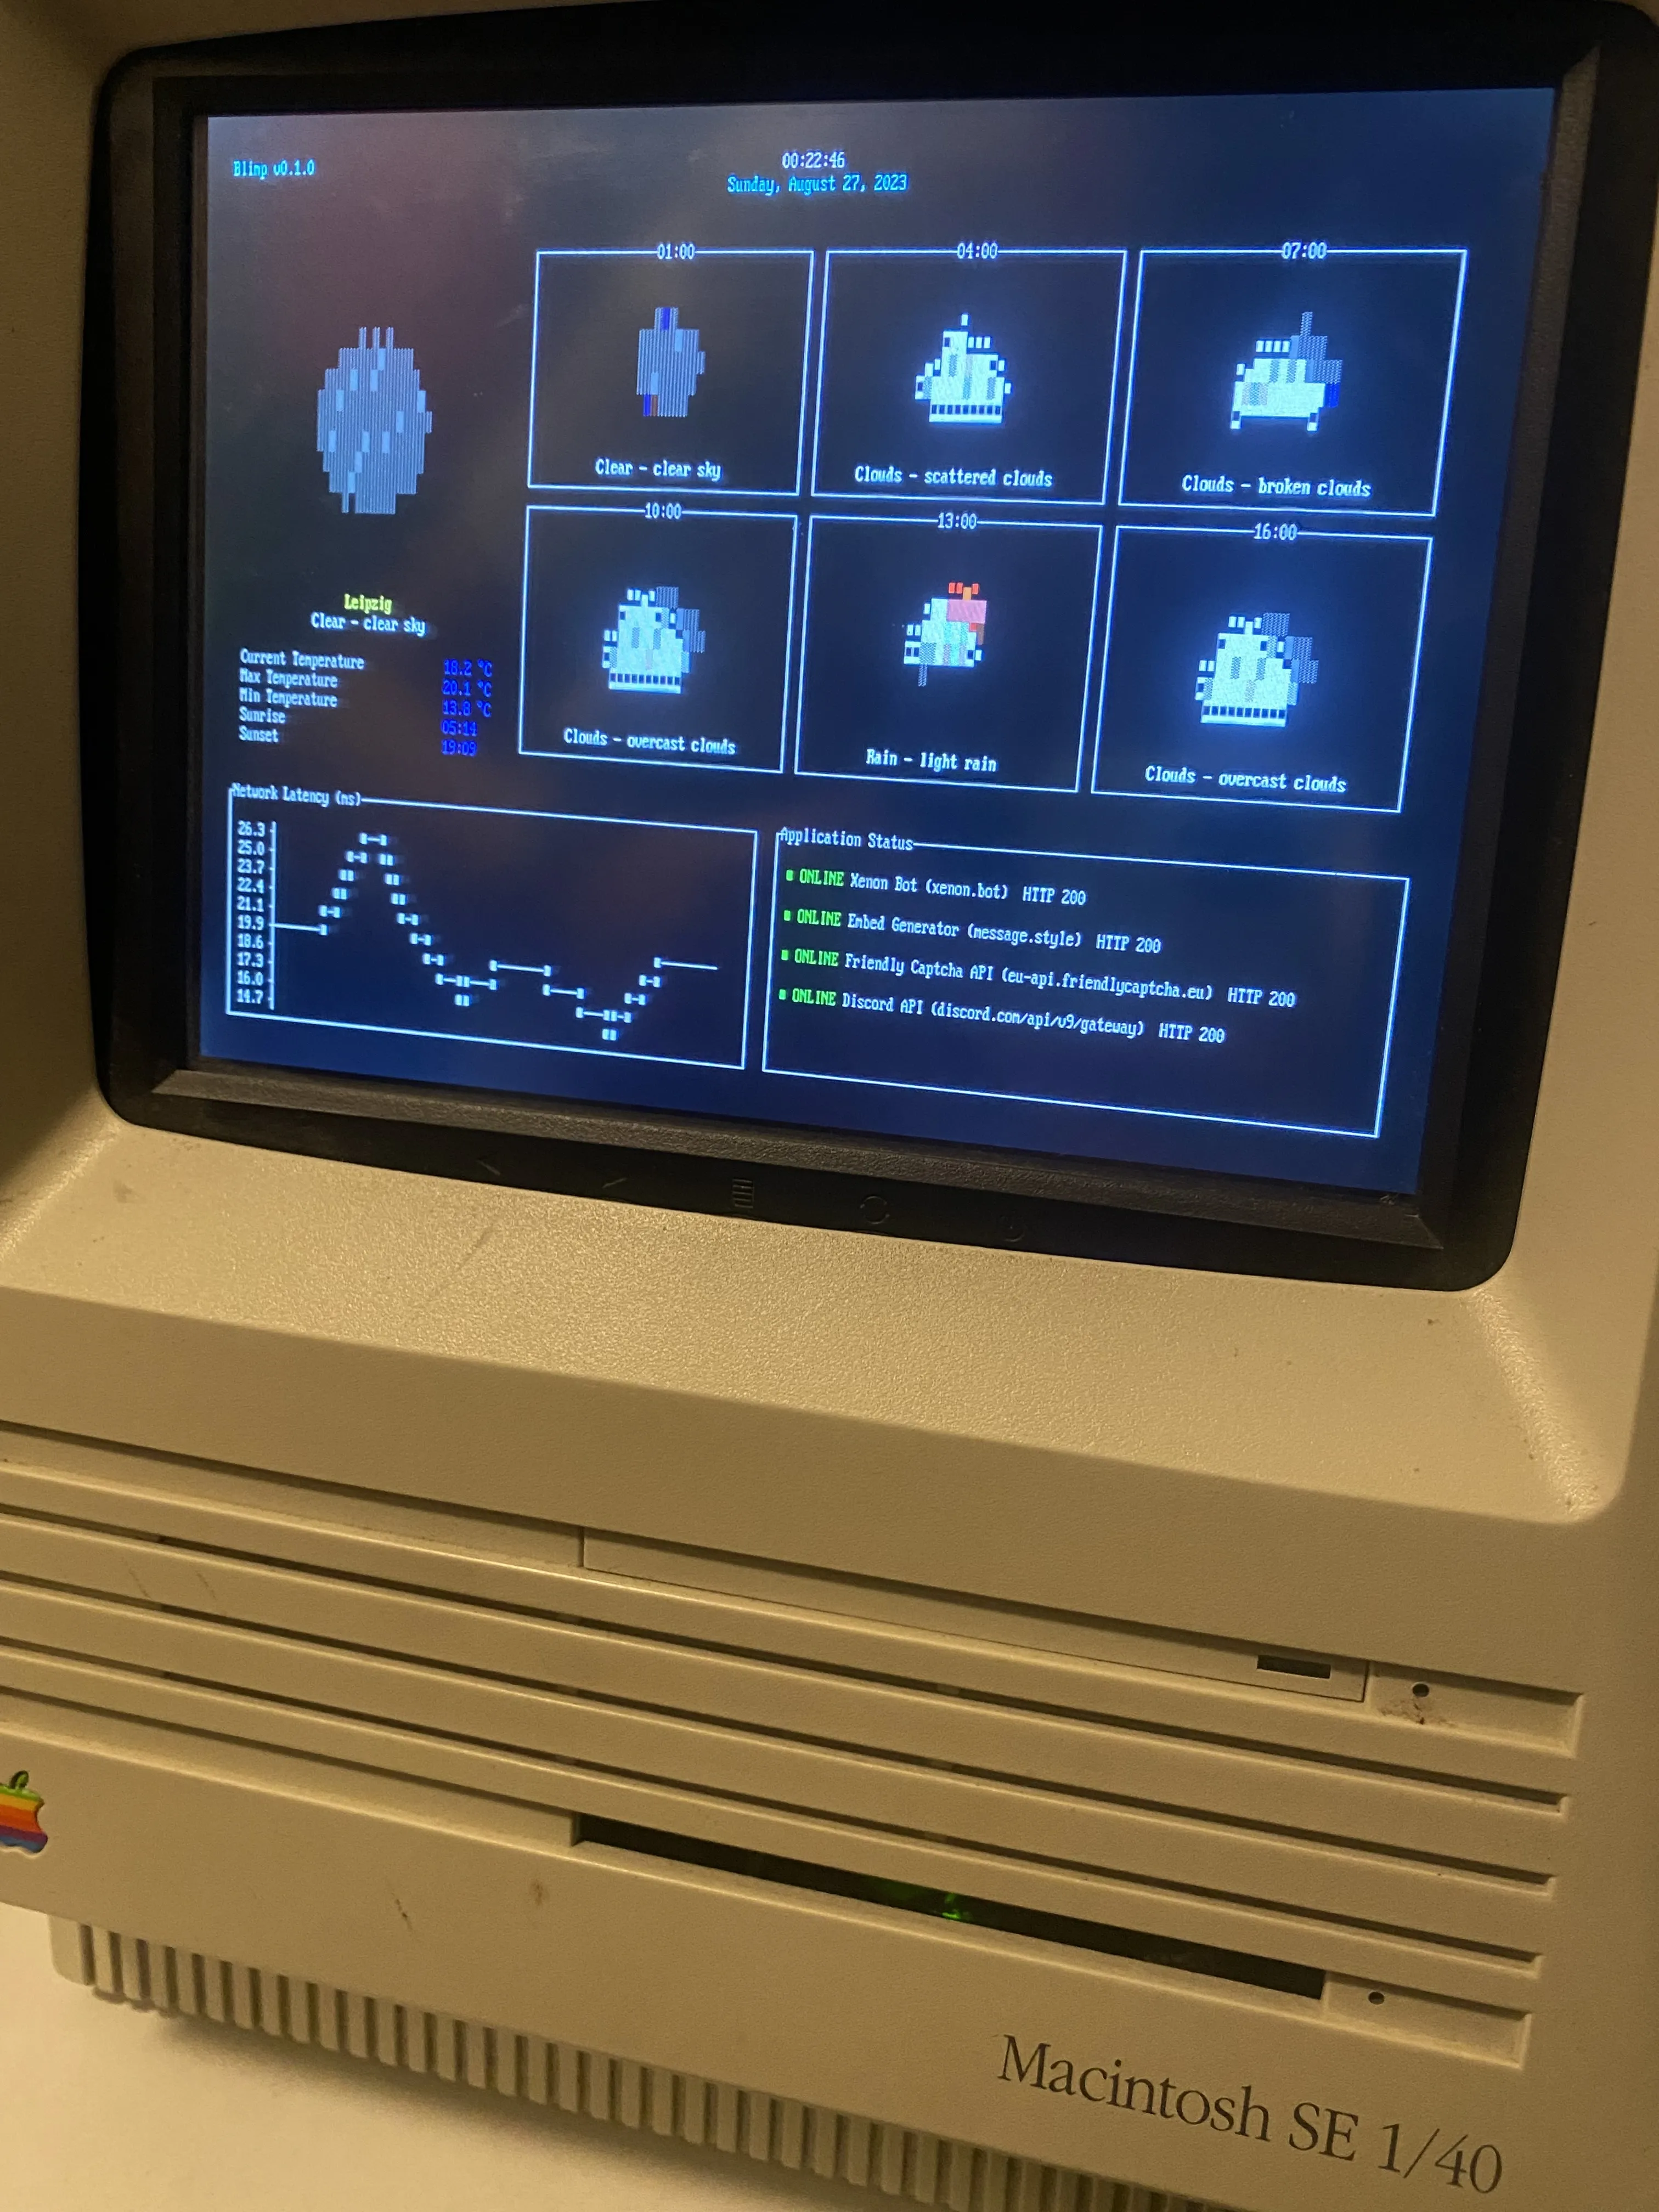
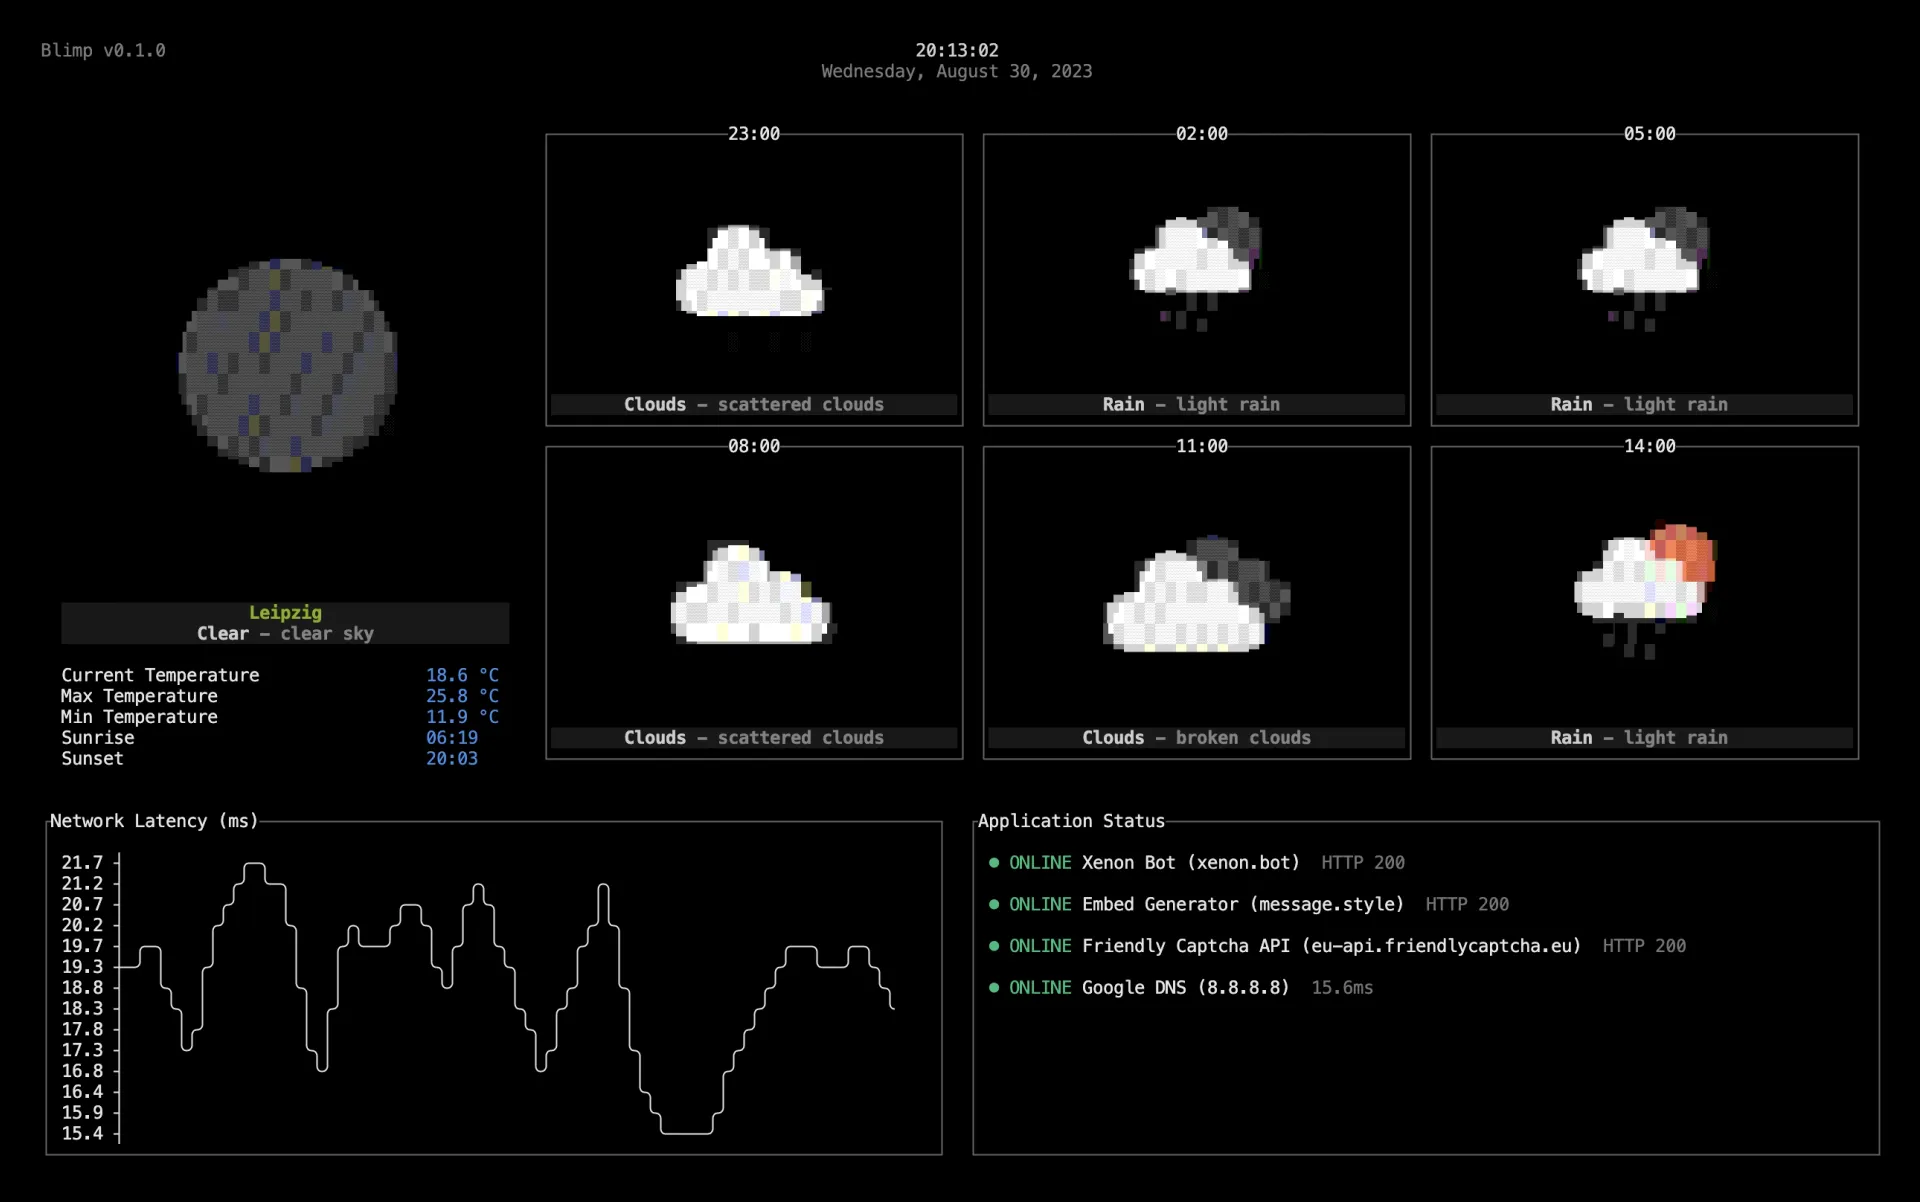
After some tinkering I ended up with a UI that looks like this:
Configurable Widgets
I wanted to make the widgets configurable so that I could easily add and remove widgets without having to change the code. For this I decided to use a TOML file to configure the widgets.
Here is an example of the configuration file:
[[widgets.status.targets]]
name = "Xenon Bot"
type = "https"
host = "xenon.bot"

[[widgets.status.targets]]
name = "Embed Generator"
type = "https"
host = "message.style"

[[widgets.status.targets]]
name = "Friendly Captcha API"
type = "https"
host = "eu-api.friendlycaptcha.eu"

[[widgets.status.targets]]
name = "Google DNS"
type = "ping"
host = "8.8.8.8"

[widgets.weather]
# Your openweathermap.org API key
owm_api_key = ""
# The latitude and longitude of the weather location
owm_lat = 51.33
owm_lon = 12.37

[[widgets.feeds.targets]]
url = "https://hnrss.org/newest"

[widgets.transit]
# Your developer.here.com API key
here_api_key = ""
# The latitude and longitude of the location where blimp will look for the next public transit departures
here_lat = 51.33
here_lon = 12.37
# The search radius around the coordinates in meters
here_radius = 500
Configurable Layout
I also made the layout configurable so widgets can be rearranged without touching the code. I also added support for multiple pages that are automatically switched between at a configurable interval.
Here is an example of multiple pages:
# How fast do you want blimp to switch between pages
page_interval = 30000 # 30 seconds is the default

# Your first page
[[pages]]
layout = [
    ["weather", "weather"],
    ["weather", "weather"],
    ["latency", "status"]
]

# Your second page
[[pages]]
layout = [
    ["feeds", "feeds"],
    ["feeds", "feeds"],
    ["feeds", "feeds"],
    ["quotes", "status"]
]

# Your third page
[[pages]]
...
Hardware
While building the software was the main part of the project, I also wanted to share what kind of hardware I used to bring the case back to life.
To run the software I decided to use a Raspberry Pi 3 Model B which is a small and cheap single-board computer that runs Linux. It’s pretty overpowered for this project but it makes it incredibly easy to run the software, connect it to a display, and have it display the UI.
To display the UI I used a 10.1” HDMI display from Amazon. It just connects to the Raspberry Pi via HDMI.
To power everything, I just put a standard multi-socket power supply into the case and hooked it up to the Raspberry Pi and the display.
End Result
I’m really happy with the end result and I have it sitting on my desk next to my normal monitor. It’s a nice way to have a bit of retro on my desk while still being useful.
I really love the retro look of the terminal UI and think this won’t be the last time I build something like this. Combining hardware and software is always fun.